Showing posts with label Notions. Show all posts

Sunday, 22 September 2013

Has anyone ever heard of a Hussif?

I hadn't until I was chatting to follower Ken a week or two ago.  I thought I knew what he was talking about until Monday when I treated myself to a copy of the Merchant & Mills SEWING BOOK.  When I saw a photograph of their project Hussif I realised the picture I had in my head was well off beam.  It turns out that a Hussif is a pocket sewing kit with some whimsical etymology thrown in for good measure.

I am rather taken by the Merchant & Mills SEWING BOOK.  It's an aesthetically pleasing object in its own right and the projects inside are, for the main part, non-gender-specific which makes a welcome change for the male seamster.

As a confirmed old bachelor with some heavy unbleached calico on his hands I figured that a Hussif is the nearest I am likely to get to a housewife and resolved to knock one up [perhaps I should rephrase that!?]

Here are some pictures of my version

Pocket Sewing Kit - open

There are seven pockets for bits and bobs sewing notions.  I made mine the same size as the instructions but the book encourages makers to adjust pocket sizes to fit the objects in their own sewing kit.  The striped ticking covers two layers of cotton quilt wadding which form a pin cushion cum needle case.

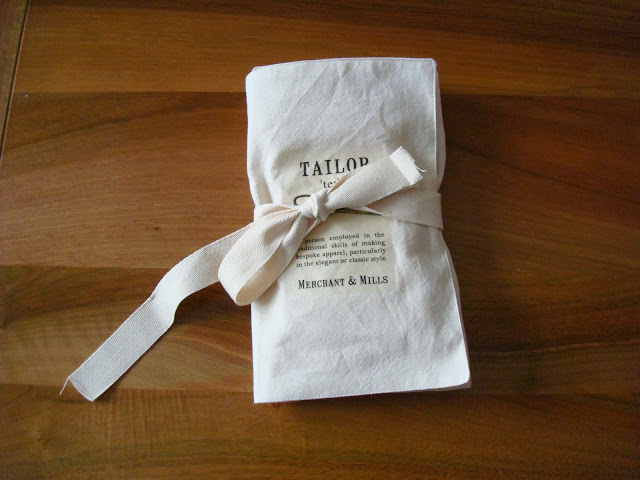
Pocket Sewing Kit - closed

Here is the Hussif all furled up and tied shut.  To give you an idea of size the cotton webbing tape is 25mm (yes I've gone metric today) or one inch wide.  I may trim the tape down a bit once things have stretched out a bit.

The first of two big adventures in making this project was printing the downloadable Merchant and Mills graphic onto what can only be described as magic paper and then transferring this to the front of the Hussif using the iron.


I think I may have overcooked the transfer slightly and the instructions on where to position it were not Gavin-proof (I may have got the graphic upside down) but overall I am pleased with the effect.  I am left with some mixed feelings about putting a company logo onto an item I have made but I like the look of the finished project and I have tried out something I never would have done otherwise.  My mind is now teaming with ideas for some kind of Oil & Thread transfer.  Possibly featuring a hen if I can find copyright free image to use.

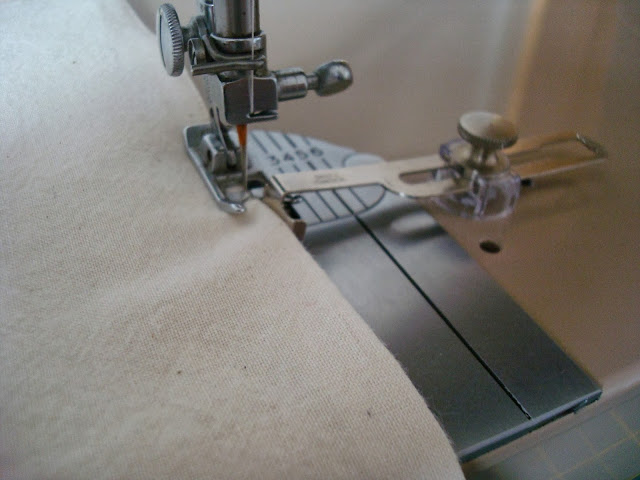
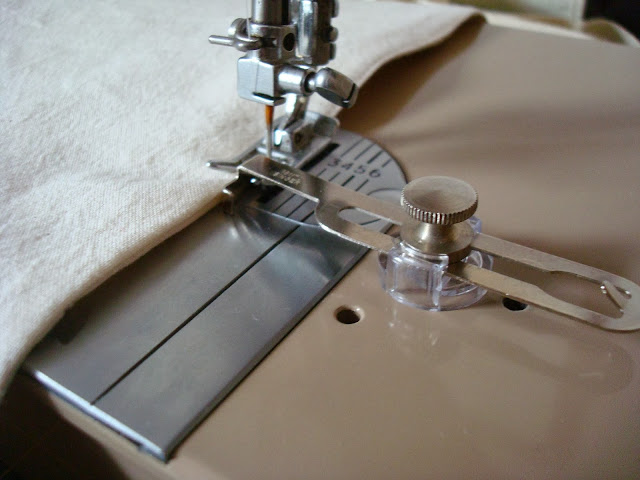
Adventure number two is a Singer 401G related discovery and one for the seam guide junkies amongst us (you know who you are).  I have discovered that the toe of the general purposes foot can be made to sit under the seam guide.  This is shown in the section of the Manual which shows how to blind stitch hems using the "BO" setting.  I realised that, with the needle centred (red lever at position 3), this gives scant ⅛ seam allowance.

Singer slant shank general purpose food and seam guide
Singer 401G: General purpose foot and seam guide

When would want a scant ⅛ seam allowance?  Well I found it handy when edge stitching the Hussif.  I hope you agree that the results are pretty tasty.


I am planning to hold on to this particular Hussif myself.  I have something in mind for it.  I really enjoyed putting this together.  It's a good way to spend a Saturday afternoon.  At this point in September I am thinking that one or two of these, filled with some 'heritage' style notions might make good Christmas presents.

Tuesday, 11 June 2013

Hamming It Up!

One of these days I am going to make a shirt and with this in mind I have been reading and re-reading Peter's sew along at Male Pattern Boldness.  One of the notions I have read about in David Coffin's book and Peter's blog is the tailor's ham.  This item is intended to make the pressing curved seams easier.  There are those who say it's very difficult to manage without one.  With all of the advice dancing in front of my eyes I decided to see if it would be possible to make a ham all of my very own.

There are dozens of tutorials on how to make your own tailor's ham.  I found this one at Chance of Rain which has an easy to print pattern piece and clear photo strip instructions.


The ham is made up of three layers of calico, one of cotton poplin and one of wool [?crepe?].  Here I have tacked the layers together and am now sewing them right sides facing.  It's a while since we've seen the Singer 15K80 so I thought I would give it an airing.  It sailed through the layers like a hot knife through butter.  I back tacked the ends of the seam by turning the work in the machine.  Not my favourite way be easy to do with small goods like the ham-shell.


Here is my ham-shell after clipping the seam allowance and turning.  The pattern advises keeping clipping to an absolute minimum so as not to weaken the seam.


Anyone for porridge?  No it's wood shavings - well softwood bedding to be exact. It's cheap enough and easier to find here than your actual sawdust. It has a wonderful smell that reminds me of my Dad.


Here is my ham after I had stuffed and sewn it shut.  The finished size is approximately six by nine inches.  I'm not sure if I got it stuffed full enough but it feels pretty firm.  I'm looking forward to seeing if it is large and curvy enough to be useful.  


There's something quite cute about a tailor's ham don't you think?  It's certainly tactile.  I can now see why they used to stuff soft toys with sawdust!