Showing posts with label Binding. Show all posts

Tuesday, 10 February 2015

Welsh quilt inspired sampler

I think it is nice, sometimes, to not really know where I am going until I get there.  That is how it was with this piece of work.  I cannot bring myself to refer to it as a project as that might imply that I had some sort of plan.  At some point I had been loaned a Kaffe Fasset book that included a quilt top pieced from a variety of striped shirtings in four triangle squares.


Well I messed about with some triangles and came up with some less than delightful squares one of which just about looked like it might be a distant relative of something from a Kaffe Fasset quilt (see above top left corner.  This was where direction changed both literally and notionally.  The nasty squares became the back of a tiny sampler for some quilting


I had been reading about the wonderful quilts produced in Wales between the first and second world wars.  What really fascinated me about these was reading how quilts were marked out by professionals who sometimes stamped the designs onto whole cloth quilt tops which would be sold and sometimes they were marked out by drawing around ordinary house hold objects like tea cups, plates and irons.  I was rather captivated by the idea but doubtful that I would find myself marking out and hand quilting a double sized bedspread.  Instead I made up a small quilt sandwich and grabbed a tea plate and pencil.  I marked out this simple motif of circles leaves and chevrons.

Traditionally this type of quilting would be done by hand but I quilted this sampler on my Singer 15K hand crank machine making up the infill as I went along.  It's a bit wonky here and there but I find the slightly naive effect pleasing.  I ended up thinking of the technique as a sort of straight-line-semi-free-motion quilting.  I doubt it will catch on but I felt I had spent enough time on this to add a binding.  I did a bit of hand ladder stitching on the binding - way too tight just look at all those puckers!  I've hung this little oddity, from one corner, on a nail that was in the wall of the sewing room.  I don't think anyone really knows what to make of it but yellow and white always makes me think of fried egg and somehow my interest in and appetite for Welsh and Durham whole cloth quilts has been whetted.


Tuesday, 2 December 2014

An apron and lots of bias binding (again)

Alright I promise that, during my sabbatical from blogging, I did sew something other than aprons but for the time being that is what I a bringing us all up to date on.  No more aprons for a while after today.  At least for a little while.

I have already blogged about Sewing Machine Basics by Jane Bolsover.   The pattern for this full length apron comes from that.  The pattern pieces for this and the other projects in the book are included on large sheets at the back of the book for you to trace off yourself.


The book is neatly arranged for the sewing novice.  Each chapter takes the form of a 'Workshop' which teaches the reader a new technique.  This is then followed by a project which makes use of the newly acquired skill.  The 'Bound-edged apron' project tests -guess what? - the use of binding and patch pockets.


I decided that the usefully sized pocket should not pattern match with main apron piece.  I did however try to centre the pattern piece on a motif so that over all the pocket ended up looking balanced.


I was very much in Singer 15K80 mode when I was making aprons during the late spring of 2014.  Hardly surprising I got a bit smitten with that machine once I got it sewing well.  Just look at those stitches!  I am rather proud of the triangles strengthening the corners.  Remember, after all, I was able to achieve those on a hand cranked machine which lacks a reverse feed - lots of needle down, presser foot up, action going on and I actually counted the stitches while I was sewing.


I am slightly less proud of the above nonsense.  The method of attaching the binding involved sewing through all layers at the same time - it looks a lot better from the right side.  This being me I was able to include, even on an apron with only two very simple pattern pieces, a flat felled seam, albeit a very short one at the nape of the neck.  There is no way I could "press open and finish seam allowance with a zig zag" given the machine I was using to sew this project - what's a boy to do?


I cut out the ties using a ruler and rotary cutter on the long grain of the fabric.  They are stitched along their long edge, turned through and then the open ends turned in and topstitched to the apron edges with a square and cross thingy.
  

All the raw edges are encased with home made bias binding.  Lots of measuring and fun!  Recognise the green fabric from the second apron with a ruffle?  I told you my stitching looked more even from the right side didn't I?


Here is the finished apron all ready to be sent off it's new owner - ignore all those work shirts that needed ironing!

Saturday, 12 October 2013

Wrap Around Pinny Finished

This is one of those sewing projects that stalled and would not restart for some time.  It was nearly finished for ages but now it is really finished.


If I had a dress form I could have shown this off a little better but the coat hanger give some idea.  The pinny crosses over at the front and ties with a slim bow at the back.


The two ties are secured at the waist with a rectangle of topstitching on the inside of the pinny.


The tie on the left front passes through a small gap in the side seam under the armhole on the righthand side of the pinny.  I reinforced this with some back and forward stitches rather than a worked buttonhole.  This is a utility garment after all.


The stalling point for me was the bias binding.  There must be about five yard of the stuff on this garment.  I made my own and first tried to attach it with the vintage binding foot on the Singer 99K.  The straights went well but it struggles with sharper curves and crossing seams.  I had to unpick the dodgy bits and go back over them with the regulars straight stitch foot.


I didn't even attempt it on the armholes.  I went out and bought a bias binder maker which is loads of fun to use and attached the binding by pinning and sewing once through all five layers.  Not the finest of finishes but fine for doing the dishes in.


Not that I will be wearing it for washing the dishes or scrubbing the front step.  It's far too small.  It has however provided me with practice using bias binding and probably the confidence to have a go at making a dressing gown sometime soon.

Sunday, 29 September 2013

Baby Fence Rail Quilt - Pt VII: The Big Finish

The Baby Fence Rail Quilt is finished.  It's new owner came to collect it yesterday afternoon an hour or two after I had put the last stitches into the binding.  It was the first time Bill and I had met baby Georgia, who is just four weeks old, and we were captivated

Please excuse my ankles
I wasn't feeling game enough to do the quilting on the Singer 201K and defaulted to my 'go to' quilter the Singer 401K fitted with the walking foot.  I used the same putty-coloured thread to secure the layers as I had used to piece the quilt top.  It shows up better from the back.


The fence rail blocks finished at six inches and used the corners of these blocks are the reference point for the diagonal lines of quilting over the central part of the quilt.  In this way the lines of quilting are four and a quarter inches apart which should be a nice density for a baby quilt.  I quilted in the ditch around the inner border.


This picture shows how well Bill's choice for the backing fabric works.  I think it pops without clashing.  When I was binding the quilt I wanted to do this in exactly the same way I bound the Log Cabin quilt earlier in the year.  I had the blog to remind me but I hadn't been very detailed.  I couldn't for the life of me recall which machine I had used to sew the binding onto the front of the Log Cabin quilt.   So here is a note to myself for future reference:

  • For the fence rail quilt I used the 401G with the walking foot to sew the binding onto the front of the quilt
  • I left eight inch tails at the beginning and of the binding which really made it a lot easier to join them together later
  • I then used a size three between and a ladder stitch to sew the binding onto the back of the quilt using the line of machine stitching from the front as a guide for my hand sewing - yet again this took me hours but I still feel it's time well spent.  After all this is a gift for a very special little bundle.
A well-padded friend maybe just as cuddly as a quilt

Sunday, 26 May 2013

The Log Cabin Quilt: Final!

Cast your minds back and you may remember that I used to write a blog here.  I didn't mean to stop writing but I didn't have anything to blog about as I seemed to have lost my sewing mojo.  I have read that this can happen.  Well my mojo has returned and I have some progress to report.

Remember my to do list?

Progress so far:


  • Machine baste around the outside of the quilt a quater of an inch from the edge of the quilt top
  • Trim away the excess backing and batting and square up
  • Cut two and a half inch strips of the red fabric for binding
  • Join strips using 45 degree seams
  • Attach binding
  • Wash, line dry and press

  • That's right!  Only a few minutes ago I put the final stitches into the binding on the quilt.  Thank you to follower Ken who explained how to make my hand stitching invisible.

    Finished log cabin cot quilt (thank you to The-Much-Belovéd for holding it up so well)
    Detail of quilting and binding back and front
    I machined the binding to the front of the quilt and then hand stitched it to the back.  Yes, it took hours!  I am happy enough with the result to make it worth the investment of time.

    How's that for a mitre?
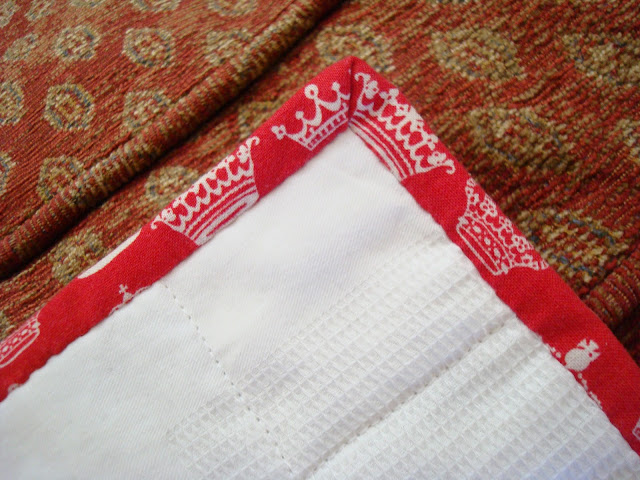
    I am particularly pleased with the way the mitred corners worked out.  I am indebted to Lizzie Lenard's tutorial on binding.  The finish on this quilt is about a hundred times better than on my first quilt at the end of last summer.

    Well that's another project completed.  I will need to wash the quilt before I post it off to it's new owner.  I now have the excitement of starting a new project.  I wonder what's next...