Sunday, 2 June 2013

Baby Fence Rail - Pt IV

I cannot believe how quickly I am managing to piece this quilt.  

I read what I could find about blocking and decided not to get too bogged down in it in the end.  All of my squares had finished to within an eighth of an inch of the expected size.  I did trim some of the oversized squares down a bit but, in the event, I haven't agonised too much.

In this picture I have sewn the 12 units into 4 rows of three, laid them out and labelled them (A-D) so I know what order to sew them together in.


Here row A has been flipped over onto row B and pinned so that the seam lines match where they cross.


Here is the result, which I got The Much Belovéd to QA for me - it passed.


Here are all four rows after I have sewn them together.  I have already cut the fabric for the two borders.  The directions were to cut six strips of each fabric, cut two of each of those in half and to join the resulting four half-strips to the remaining four full strips.  I have already completed this so just a little more work will see this quilt top completed.  Then I will have to think about buying some  batting and how I will quilt the thing - more in the ditch work or any alternatives?


Thursday, 30 May 2013

Baby Fence Rail - Pt III

I have been chain piecing the 48 squares into pairs and pressing them.  I had experimented with chain piecing when constructing the piano key border for the log-cabin quilt and I think it is the best thing since the invention of the lock-stitch machine!  It's hard to believe how much such a simple technique speeds up the piecing process.  I use a dry iron to set the seams and then I snip the units apart before "pressing to the dark side"


The 48 squares make 24 pairs which, in their turn, will be sewn together creating 12 four patch squares.


Here I have managed to sew together 12 of the pairs to produce six squares.  I stopped here because the light was starting to fail (to be fair it hardly got light today) and I wanted to get some pictures taken.  I used a couple or three pins to make sure that the seams all stayed matched at the centre of the blocks.  They've come out well so far and the 201K has behaved faultlessly.  The hinged presser foot has managed to glide over the pressed seams and pins beautifully.


I may carry on and sew the remaining pairs into squares this evening but I will need to spend some time reading up on "blocking".  The larger squares should measure approximately 12 and a half inches and finish at 12.  The ones I have completed aren't far out but I really want to be as accurate as possible.  From what I can tell blocking will help me establish the 'true' sewing line for when I piece the units together in rows.  One method advocates using a square ruler and a pencil to establish this line the other a rotary cutter to trim blocks down to size.  I think am leaning toward the drawing rather than the cutting method.  Less scope for disaster at this stage perhaps? 

Wednesday, 29 May 2013

Baby Fence Rail - Pt II

All eight strip sets have been sewn together and pressed.  Each one has been cut into six and a half inch squares.

The Radio is my constant companion in my sewing adventures


Each strip set yields six squares a total of 48.

Tuesday, 28 May 2013

Baby Fence Rail - Pt I

Last night I pre-washed the fabric I bought for this project back in March.  It was all dry by the time I got home this evening and ready to be ironed.

With the fabric ironed I got to work with the rotary cutter.  I didn't set out to do all my cutting in one go but I had no idea how quickly this would go when working with new yardage and a new cutting disc.  To date my patch work has all been put together from repurposed garments or left overs from other projects.  This has meant dealing with irregular shapes and a certain amount of patch by patch cutting.  New fabric is regular in shape, easy to fold and it took no time to cut eight, two and a half inch, cross-width strips from each fabric.  I then cut a further six wider strips from two of the fabrics.  These will form narrow and wider borders.  The binding will be made of the third (yellow) fabric.

Don't the cut fabrics look satisfying all laid out and ready to go?

The brand new spool of natural coloured Gutermann's sew all was too much for me to resist so I got to work filling a bobbin.  I have decided, as this project begins with sewing strip sets, to use the 201k to piece this project.  The large level working space provided by the cabinet will be useful.


Filling bobbins is a task I always enjoy and never more so than on my 201k.  The rubber tyre is nearly new so the winder fills bobbins a treat!  This is where I intended to stop for the evening but all that lovely cut fabric was just too tempting.

So here it is - the first strip set I have sewn and pressed.  The ironing board cover is new.  I bought it off the peg but had to do major surgery yesterday afternoon to make it fit my tiny ironing board.


Sunday, 26 May 2013

The Log Cabin Quilt: Final!

Cast your minds back and you may remember that I used to write a blog here.  I didn't mean to stop writing but I didn't have anything to blog about as I seemed to have lost my sewing mojo.  I have read that this can happen.  Well my mojo has returned and I have some progress to report.

Remember my to do list?

Progress so far:


  • Machine baste around the outside of the quilt a quater of an inch from the edge of the quilt top
  • Trim away the excess backing and batting and square up
  • Cut two and a half inch strips of the red fabric for binding
  • Join strips using 45 degree seams
  • Attach binding
  • Wash, line dry and press

  • That's right!  Only a few minutes ago I put the final stitches into the binding on the quilt.  Thank you to follower Ken who explained how to make my hand stitching invisible.

    Finished log cabin cot quilt (thank you to The-Much-Belovéd for holding it up so well)
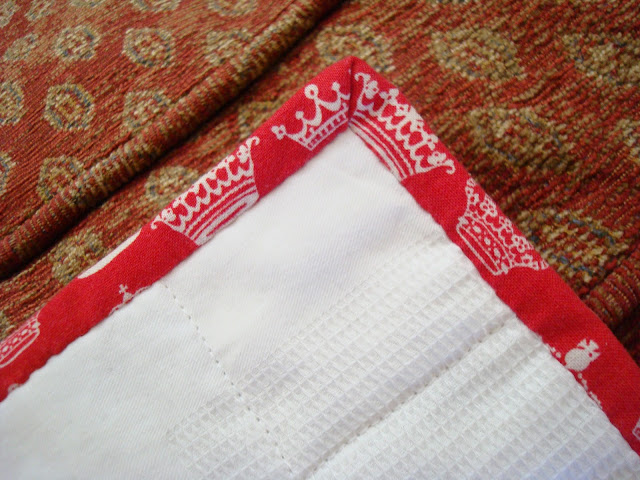
    Detail of quilting and binding back and front
    I machined the binding to the front of the quilt and then hand stitched it to the back.  Yes, it took hours!  I am happy enough with the result to make it worth the investment of time.

    How's that for a mitre?
    I am particularly pleased with the way the mitred corners worked out.  I am indebted to Lizzie Lenard's tutorial on binding.  The finish on this quilt is about a hundred times better than on my first quilt at the end of last summer.

    Well that's another project completed.  I will need to wash the quilt before I post it off to it's new owner.  I now have the excitement of starting a new project.  I wonder what's next...

    Tuesday, 7 May 2013

    And the Singer 99K makes five!

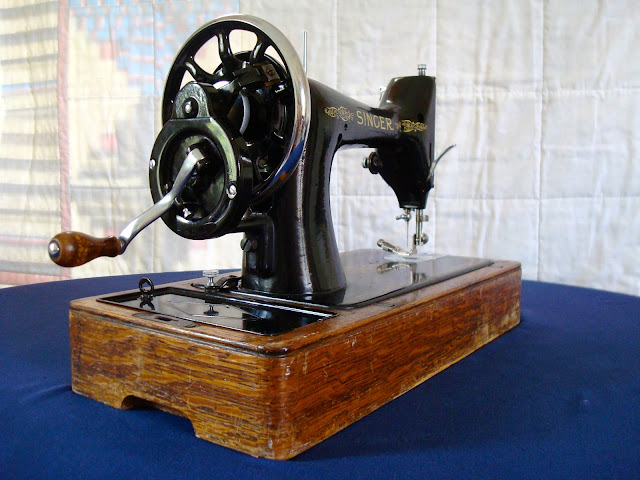
    Another new arrival at Oil and Thread.  Oops.  I'm sorry.  I didn't mean to do it.  I couldn't help it.  She was a local beauty, the price was right, I was weak.  Anyone will tell you these are excuses and not reasons and they'd probably be right but who could have resisted this little honey?  A 1935 Singer 99k, the bright work is unmarked and the black lacquer still has a deep gloss.

    Singer 99k from front

    The following were included with the machine
    • rigid straight stitch foot
    • adjustable hemmer foot
    • two class 66 bobbins
    • a couple of needles
    • Singer screw driver
    • correct instruction book
    The key and the extension table are missing but as we all know a narrow screwdriver will open and lock the case with impunity and I can live without an extension table until fate is kind enough to send one my way.


    Singer 99k hand crank from behind

    The vendor told me that he had bought this machine from a sewing machine dealer, for his wife, in 1979.  I think she must have used it quite a bit because the bobbins were each wound with the statutory five different colours and there was a LOT of fluff behind the faceplate, around the hook and in the base.  I resorted to a vacuum cleaner and an old toothbrush.

    With the fluff removed, oil in all of the usual places got shot of the slight squeak from under the machine bed.  The slide plate had been pulled off but was easy to replace by following the directions in the instruction leaflet.  The machine produced excellent stitches with balanced tension right from the word go.  It must have been well set up back in '79 because there was very little for me to do except get down to some sewing!

    Singer 99k face plate
    Not just a pretty face(plate).  The eagle eyed will notice that a binding foot has been fitted.  What can Mr G be up to?

    Singer 99k bentwood case with logo transfer
    The bentwood case is in more than fair condition but missing a key.  I will wax polish it someday I promise.

    In closing today I am going to offer some buying advice.  This machine was offered for sale at auction at a tiny starting price.  I have seen similar on offer for ten and even twenty times what I paid for it.  My point?  Set a limit and then be patient.  There are a LOT of little black Singers out there in the world.  If you sit tight the right one will come and find you (almost).

    Monday, 6 May 2013

    The Log Cabin Quilt: Quilting in the Ditch


     Well where has the time gone?  Over two weeks since my last post.  The Log Cabin Quilt should probably be finished by now but alas it is not.  Here it is as of this morning.


    And here are two more shots, of the backing, which I think show up the quilting slightly better.  I quilted in the ditch between each log cabin block and then the border.  My certainty left me at that point.  I then decided to to quilt in the ditch between each pair of piano keys in the border.  I think that overall the quilting feels quite balanced at this stage.  


    I was toying with the idea of adding diagonal quilting across the centre log cabin section of the quilt but after some discussion with The-Much-Beloved I have decided not to.  We both agreed that additional diagonal lines might detract from the detailed patchwork of logs.


    At the moment the quilt feels robust enough to stand up to wear and washing.  The batting suggested quilting up to ten inches apart.  The widest point between rows of quilting on this piece is seven inches so I am well within tolerances.  At the same time the quilt is still supple and flexible cuddly.  This is intended for a cot so I wouldn't want to over quilt and end up with something that felt too rigid.

    In an attempt to focus on the finish line here are the next steps

    1. Machine baste around the outside of the quilt a quater of an inch from the edge of the quilt top
    2. Trim away the excess backing and batting and square up
    3. Cut two and a half inch strips of the red fabric for binding
    4. Join strips using 45 degree seams
    5. Attach binding
    6. Wash, line dry and press